Showing posts with label Tutorial. Show all posts

Tuesday, 26 February 2013

How to make 40k Desert Scenery Part 2

This is probably my last post in February 2013, so it seems this year that I have been spending a lot of time doing scenery, and something which I've actually quite enjoyed and in some ways I find it easier and more enjoyable than painting miniatures for a number of reasons. So below you can see some of the pictures for the progress that I have been making with my desert scenery.


Above is the base coat and below is some pics of the first steps of highlighting.


Not much to see, but an update nonetheless, so hopefully next time I will have a little bit more progress to display, so until then.

Wednesday, 6 June 2012

How To Make Trees From Green Scrubber Pads

So with a tournament on the horizon I have been spending a lot more time making scenery, and this is currently one of the projects that I have been working on and overall I must admit it's came out rather well.

Well first things first it's the most simplest thing you can ever do, 

1. Simply go to a supermarket and get yourself some green scrubber pads, their cheap and effective.

2. Go into your garden and get some sticks.

3. Cut up your pads into various sizes

4. With a pencil punch a hole through the centre of each pad, then slide them up the sticks keeping the smaller bits to the top, after all it is supposed to look like a tree.

And there you have it as simple as that,below you will see some pictures of the work in progress.


Because I was doing mine as a ice world I painted textured paint over them to make it look like snow.


So there you have it hopefully it will give you some inspiration to do your own.

Saturday, 10 March 2012

War On The Shore 40K Tournament Scenery Work In Progress Update

First things first sorry about the lack of posts recently but trying to organise my first tournament isn't exactly giving me a lot of spare time to spend on my blog, so with that in mind I thought it was about time to do a quick post, on what I have been working on.

As promised these are the first pics that we have taken of some of the scenery, that I have been working on behind the scenes to get ready for the tournament. All 12 tables will have a minimum of 25% of fully painted scenery.


We're not too sure what this is going to represent possibly a destroyed factory of some sorts


I'm a great fan of using texture paint as I think it definitely works and can be done quickly.


Some of our new jungle scenery that I an currently working on and I think they will look great.


So there you have it short and sweet hopefully over the next couple of days I will get round to doing a little bit more but in the meantime enjoy.

Also if you live locally in Ireland North or South make sure you hit the link on the left-hand side of my blog to the tournament itself as you would be more than welcome to attend and say hello.

Monday, 2 January 2012

How To Cast Resin Tutorial Demoulding Gatling Gun Big Shoota (Part 6)

So it has been awhile since I have last updated this tutorial, and being it is the first post of the new year there's no time like the present. Also if you missed the first one check out the link below.


So in this one I'm just going to focus on the big shoota that I scratched built some time ago for my 9 killerkans. This was the first time I have ever tried casting for myself and was a bit worried in regards to the results that I would achieve. 

So I was very nervous to see exactly what way it would have turned out,


You can see close-up of the resin has casted very well with no bubbles so it is definitely worth your while taking your time when pouring the resin.


 Bearing in mind that all my killerKan are magnetised, it was as simple as sticking some nuts to the side of them so they would easily be attached. and before any time had passed 3 of them were complete ready to paint.


 In these pictures you can see them attached to the unit of killerKan.


I was really surprised how well they turned out considering that something might have gone wrong either with their mould or the resin itself, but on this occasion everything was perfect.

Wednesday, 16 November 2011

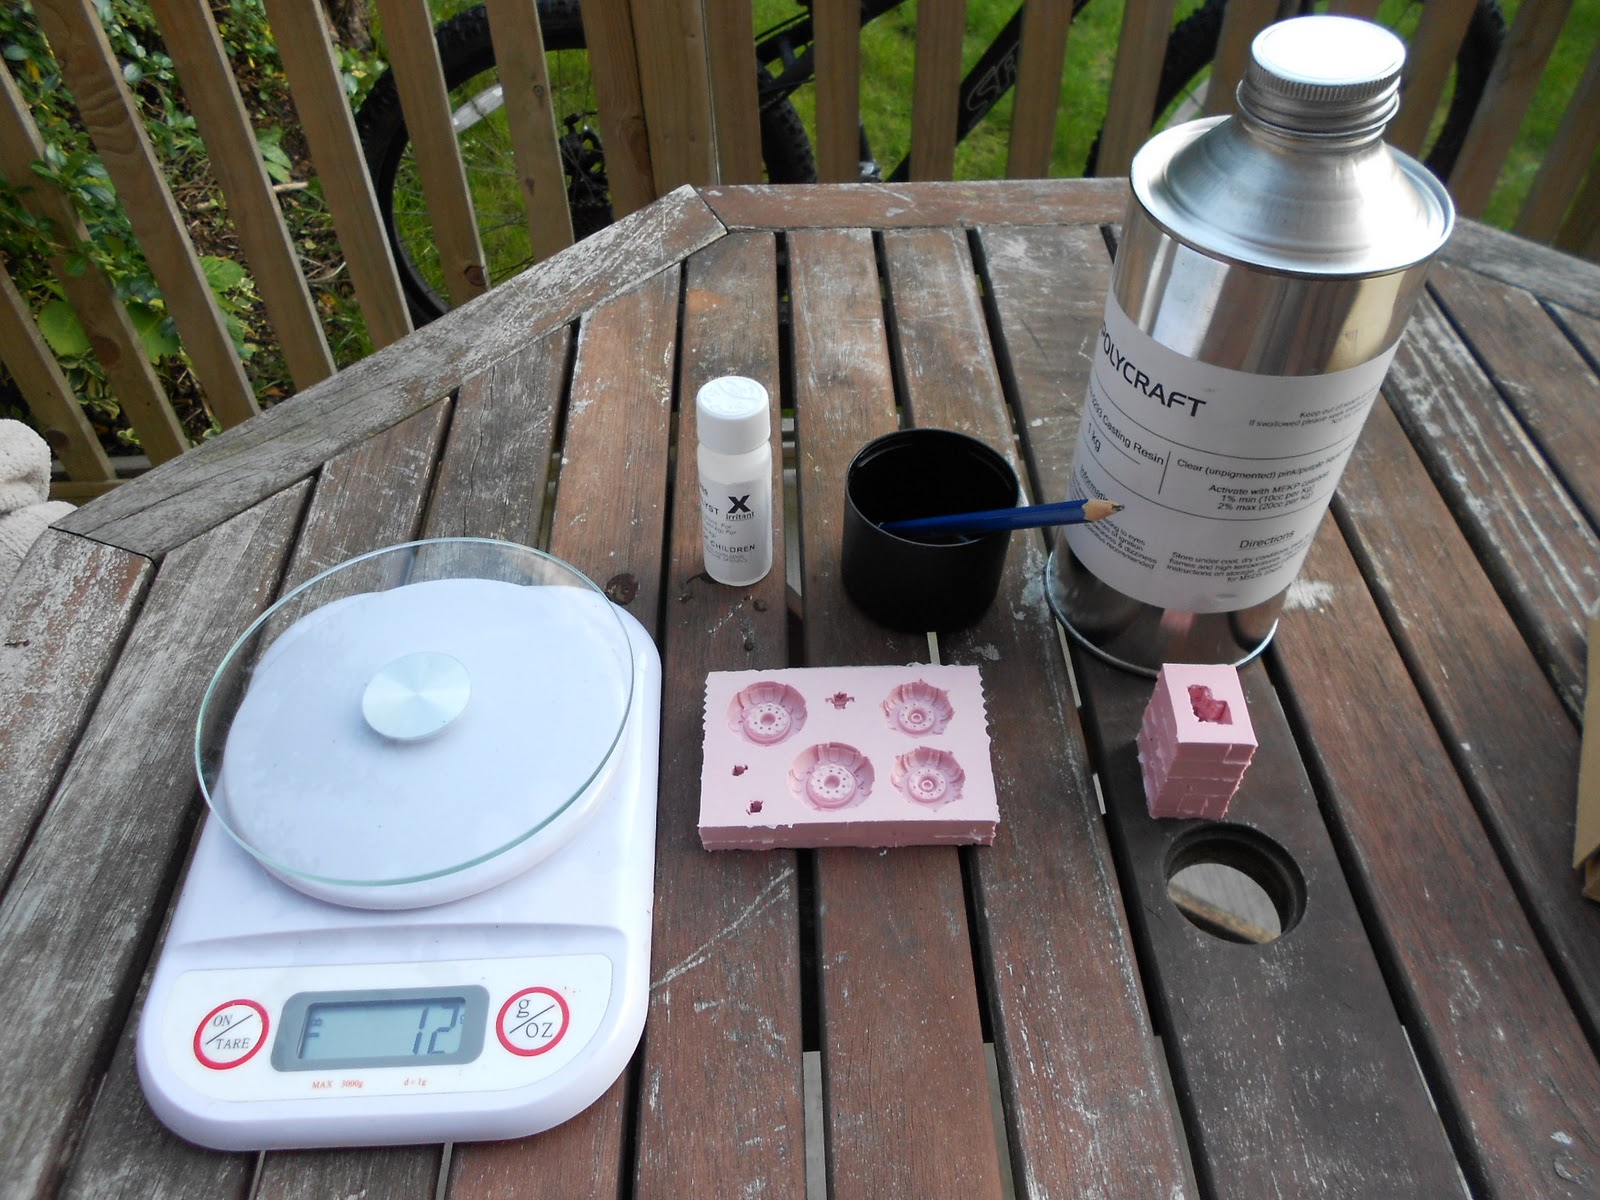
How To Cast Resin Tutorial Mixing And Pouring The Resin Itself (Part 5)

So now comes the fun stuff. From the start it's probably best to do it outside in a well ventilated area, as some of the fumes can be quite harsh, and remember safety always comes first.

Just read and follow the instructions of your resin and it will tell you the ratio of hardener to resin, when you start to mix It. Also handy to have is a set of weighing scales available, as you can get precise and accurate measurements and you don't want any waste, after all resin itself isn't cheap.


So once you have mixed your resin and hardener together, very gently for a few seconds, it's important to get this right as too little or too much of either will make the batch useless for example it hardens too soon or it will not harden at all, all of which you do not want.


It's important that you try and keep air bubbles to a minimum.


 So gently pour the resin into the mould starting at one side take your time and do it slowly. With a toothpick gently make sure the resin gets into all the nooks and crannies, and be on the lookout for air bubbles try and bring them to the surface, or make sure that they are in the middle of the resin itself.


Using the same toothpick once you have done the above you can easily scrape off any excess that you come across,


Take a good look at the above picture and you can see the air bubbles have been brought to the surface as there's nothing worse than the moulding and finding that there has been a big air bubble in the resin.


Also don't be afraid to gently tap or squeeze your mould to make sure that the resin gets into all the areas


So there we have it, all you need is to leave them for a few hours and let them set this, and if everything has went to plan you shall have some new bits and pieces to play with.

Sunday, 30 October 2011

How To Cast Resin Tutorial De-Moulding (Part 4)

In the next couple of steps I am and going to show how the mould has came out and the results so far. For me I was a bit nervous as this was the first time, I have ever done such a thing and was quite excited to see the results so far. 

So things are moving along quite nicely, in regards to making the mould.
In this pic you can see that the Gatling gun has turned out quite nicely. Although the only thing I would recommend is that you leave it to dry overnight to make sure that it has completely set.

And hey presto.
 After I removed the Lego you can see where the mould has leaked through the gaps, this in itself isn't too much of a problem and it can easily be removed with scissors etc.

This is a good example of the plasticine making sure there is no gaps.
At this pic things are looking quite good, just make sure you're taking your time removing your pieces as you can find they can stick and you do not want to damage the mould itself.


After a little bit of pulling everything managed to come out exactly to plan, just take your time as some bits can be quite stubborn and they might need a little bit more persuasion to get them might.

 I just use some scissors to clean them up around the edges.
Even the ork Gatling gun mould came out with no problems. this for me was one of the biggest concerns to whether or not that it's mould would come out ok but as it turned out everything seemed fine.

I didn't actually realise how much of the detail would be captured in the mould.
looking back I could have had fitted more pieces in to cast, in the mould. After all you want to maximise all the potential room but in saying that it was my first time, and I will no doubt put it down to experience for the next one I do.

 So in the next step I'm going to start mixing the resin itself and hopefully have some more pictures very soon.


Saturday, 22 October 2011

How To Cast Resin Tutorial Part 3 Making The Mould

Probably one of the most important bits to get right, so take your time after all you do not want to get through making your mould, only to find out that it has went horribly wrong.

Also you will only have a limited supply of materials and you don't want to waste any considering it's quite expensive. So making sure you get the following steps right from the very start will help to keep waste to a bare minimum.

As you can see I'm going to make another mould for a little bits and pieces that I need as well as the killer Kan Gatling gun. at this point I recommend getting some Lego as you will need it to make your box for your mould it's probably the best stuff to use, and being relatively cheap it's cost-effective.


When doing this it's important that you spent a little bit of time to make sure that your bits they are firmly attached to the base. As what can happen the bits that you wanting to cast can sink into the mould, and you have to do it all over again, and no one wants that. 


To do this I recommend using plaster scene as it makes a very secure bond, also it's important that you make sure that you seal the bottom properly as you do not want any mould mixture leaking underneath. 


so make sure it's neat and tidy 


So with all that hard work done it is time for the fun stuff. Make sure you read all the instructions of your mould and catalyst properly as it will tell you the delusion ratio that you will need to do when it comes to mixing the 2 parts together normally for catalyst it is about 1 percent of the mould mixture. 


The way I find it easiest to measure these out is with some scales, after that it's as simple as mixing the two parts together. As you can see the air bubbles rise to the surface which ultimately you want to see if your mixture is right , so once again make sure you take your time.


So now comes to the pouring, starting at one side slowly pour your mixture into the mould slowly as this will cover as much detail as physically possible.


there is no prize for 1st place so take your time as you want to minimise the amount of air bubbles.


As stated above that's why it's so important to make sure that the parts that you are moulding have been attached with no gaps underneath as you do not want the mauled mixture getting underneath, so make sure you've taken your time at the very start.


as you can see I actually ran out so I had to make some more but this picture is a good example of the air bubbles rising to the top. At this stage just put it in a warm room on a flat surface and let it dry completely for a good couple of hours.


Using the same process as above I will start to cast the killer Kan Gatlin Gunthis, I must say I was a little bit nervous to see whether or not it would actually work as it's a little bit more complicated with all the little bits of detail like rivets etc.

But a good friend of mine AJ reassured me that it would work.


 There you have it pretty much finished. So in the next step I'm going to reveal the mould, themselves and finally get down to casting the resin.

For me this was the first time I have ever done casting and although it is trial by error there's nothing really hard about it. It's as simple as following the above steps and taking your time.


People assume that casting resin is a quick fix and yes when you have your Moulds up and running it can be, but at the start there is a little bit of time and effort but like anything in life you only get out what you put in.

And having this technique at your disposal it can makes it all the more worthwhile to get right from the very start. and it also opens up loads of potential. 
Related Posts Plugin for WordPress, Blogger...