Showing posts with label Painting. Show all posts

Thursday, 27 February 2014

My new 40k display board part 2

Following on from my last post, the most important thing is to keep thing simple, when it comes to painting. Below you can see my first, coat of paint which has been applied all over, and it might help to add a little bit of water to your paint.


Now it's time to start dry brushing, there's plenty of articles online that will go into a lot more detail in regards to this technique.


So third and final highlight is now complete.


You can simply just apply static grass directly, although overtime I do recommend that you apply a base coat of green beforehand, as sometimes it will show underneath.


And there you have it job done, from the very start this is a very simple project and hopefully it will inspire you to make the effort and do one for yourself. Also there is nothing more satisfying than attending your next tournament and showcasing your army to its best potential.

Friday, 21 February 2014

Just showcasing the start of my new 40k display board.

Not wanting to be out done by my best friend AJ, and rival nemesis on the tabletop, it was about time that I had a quick go at trying to make a display board for tomorrow's tournament. From the very start it needs to be said that this is extremely quick, as I was still drying the paint with a hairdryer whilst applying a black primer. So hopefully I'll have a little bit more of an update very soon.


For the majority of my scenery projects I will used this texture paint, although expensive it's definitely long-lasting and hard wearing which is exactly what you want.

Monday, 4 February 2013

A Discussion On Painting Scores In Tournaments.

I've been going to tournaments, and not seeing fully painted armies. Now, you may be thinking, Tom, you're off your rocker, and at times, people not showing any effort, or have any interest, and naturally it's not for everyone. On the one hand, we have little Timmy, who has spent many hours lavishly painting his army. Now his army may not be the best painted, and he is not necessarily the best painter, but you see that he is trying. That he has made an effort, that he truly enjoys the hobby in all it's aspects. So what's the best way to Implementing painting scores in Tournaments. After all is it not about the hobby and winning come second?


 For example if you turn up with a fully painted army whatever the level should you be rewarded with a painting score? You will find that it might be the best way to inspire people to actually paint. TO's certainly don't want to exclude anyone, that's not the point, But TO's do need to encourage gamers to pick up there paintbrushes and possibly reward those that do. All the major tournaments all over the world, already do it. So why should we be any different implementing 3 colours minimum, 

 Remember non-painted miniatures at a tournaments should be the exception, not the rule. If that's the case why even take models, we all can simply just cut out bits of polystyrene and paper.

But as always it's great to get some feedback.

Wednesday, 6 June 2012

How To Make Trees From Green Scrubber Pads

So with a tournament on the horizon I have been spending a lot more time making scenery, and this is currently one of the projects that I have been working on and overall I must admit it's came out rather well.

Well first things first it's the most simplest thing you can ever do, 

1. Simply go to a supermarket and get yourself some green scrubber pads, their cheap and effective.

2. Go into your garden and get some sticks.

3. Cut up your pads into various sizes

4. With a pencil punch a hole through the centre of each pad, then slide them up the sticks keeping the smaller bits to the top, after all it is supposed to look like a tree.

And there you have it as simple as that,below you will see some pictures of the work in progress.


Because I was doing mine as a ice world I painted textured paint over them to make it look like snow.


So there you have it hopefully it will give you some inspiration to do your own.

Sunday, 22 January 2012

Alternate Colour Schemes For Painting Grey Knight.

Like many gamers we probably spent too much time looking around the Internet, because recently I came across these beautiful Grey Knights on a topic that was originally started on Dakka Dakka, I always had a idea of painting Grey Knights actually grey. I know it sounds strange but these are a beautiful example of what can be achieved when keeping your colour scheme very simple and straightforward,and as you can see less is definitely more.


The highlighting have been To the bare minimum which means painting can be done relatively quickly so you shouldn't have too much trouble banging these guys out in no time at all.


So is very straight forward, keeping it simple from the very start, which means that you can easily spend a little bit more time on things that really do help make it stand out, so whoever owns these I'm quite jealous.

Saturday, 24 December 2011

Why Does GW Not Paint Models Any More In Store?

Just recently been in my local GW, and there seems to be a very high level of non-painted miniatures in the cabinets for example just showing off new releases on sprues.


 I remember not too long ago in years gone by, the cabinets in GW were filled with beautifully painted miniatures and models, also they seem to be updated regularly.  Nowadays it seems to be this month's new release out-of-the-box sprue taking centre stage..


Don't get me wrong as I can see the appeal but seeing it regularly, in-store for me, makes the hobby look very cheap. I can understand with the new stores format of only having one member of staff, it would be near impossible to get anything painted, so in that instance, I can sort of understand but as a general rule it all seems to be the norm rather than the exception.

As a painter myself, for me it's about the model as a whole and unfortunately whether you like it or not painting is part of the hobby, so it would be good for GW to lead by example when it came to their display cabinets in-store, and tried to bring them back to life. 

After all there is so much potential at your fingertips.

Saturday, 30 July 2011

My Conversions Wazdakka Gutsmek (Painted)

So with another tournament happening next week at Arkham gaming centre it was only a matter of time to take My Wazdakka Gutsmekout for a spin. The model itself was done a few years ago and as you can see by the pictures I still need to do a little bit more work to do before it's finished and ready for the tabletop at next week's tournament.


you will probably no doubt be familiar in regards to what models I used to convert him


Gutsmek himself was a little bit more difficult to do using a old metal war boss which isn't the easiest model to fit on a bike, but nonetheless with a little bit of effort it was easy to get around


also I have recently added exhausts which I'm going to paint very soon as I think it needed a little bit more exaggeration in regards to speed, and I think overall it works quite well.


and finally another close-up pic of his weapons i.e. 2 twin linked Gatlin guns to represent his shooting firepower. I do not have a lot of experience playing with a war boss on a bike so hopefully things turn out for the best. and with 4 strength 8 24" rockets at his disposal it sounds good to me, and also being able to fire after he Turbo boosts it definitely good , not to mention his mega blaster.

Monday, 20 June 2011

(Part 2) Ork Battle Wagons Big Shoota Conversions (Painted)

So I have finally managed to updating my blog and I have just recently finished these guys and I am extremely pleased the way they have turned out.

another close-up shot

As you can see by using little bits and pieces you will no doubt have lying around you can easily make them very unique.


So there you have it pretty much finished onto my next project.

Friday, 17 June 2011

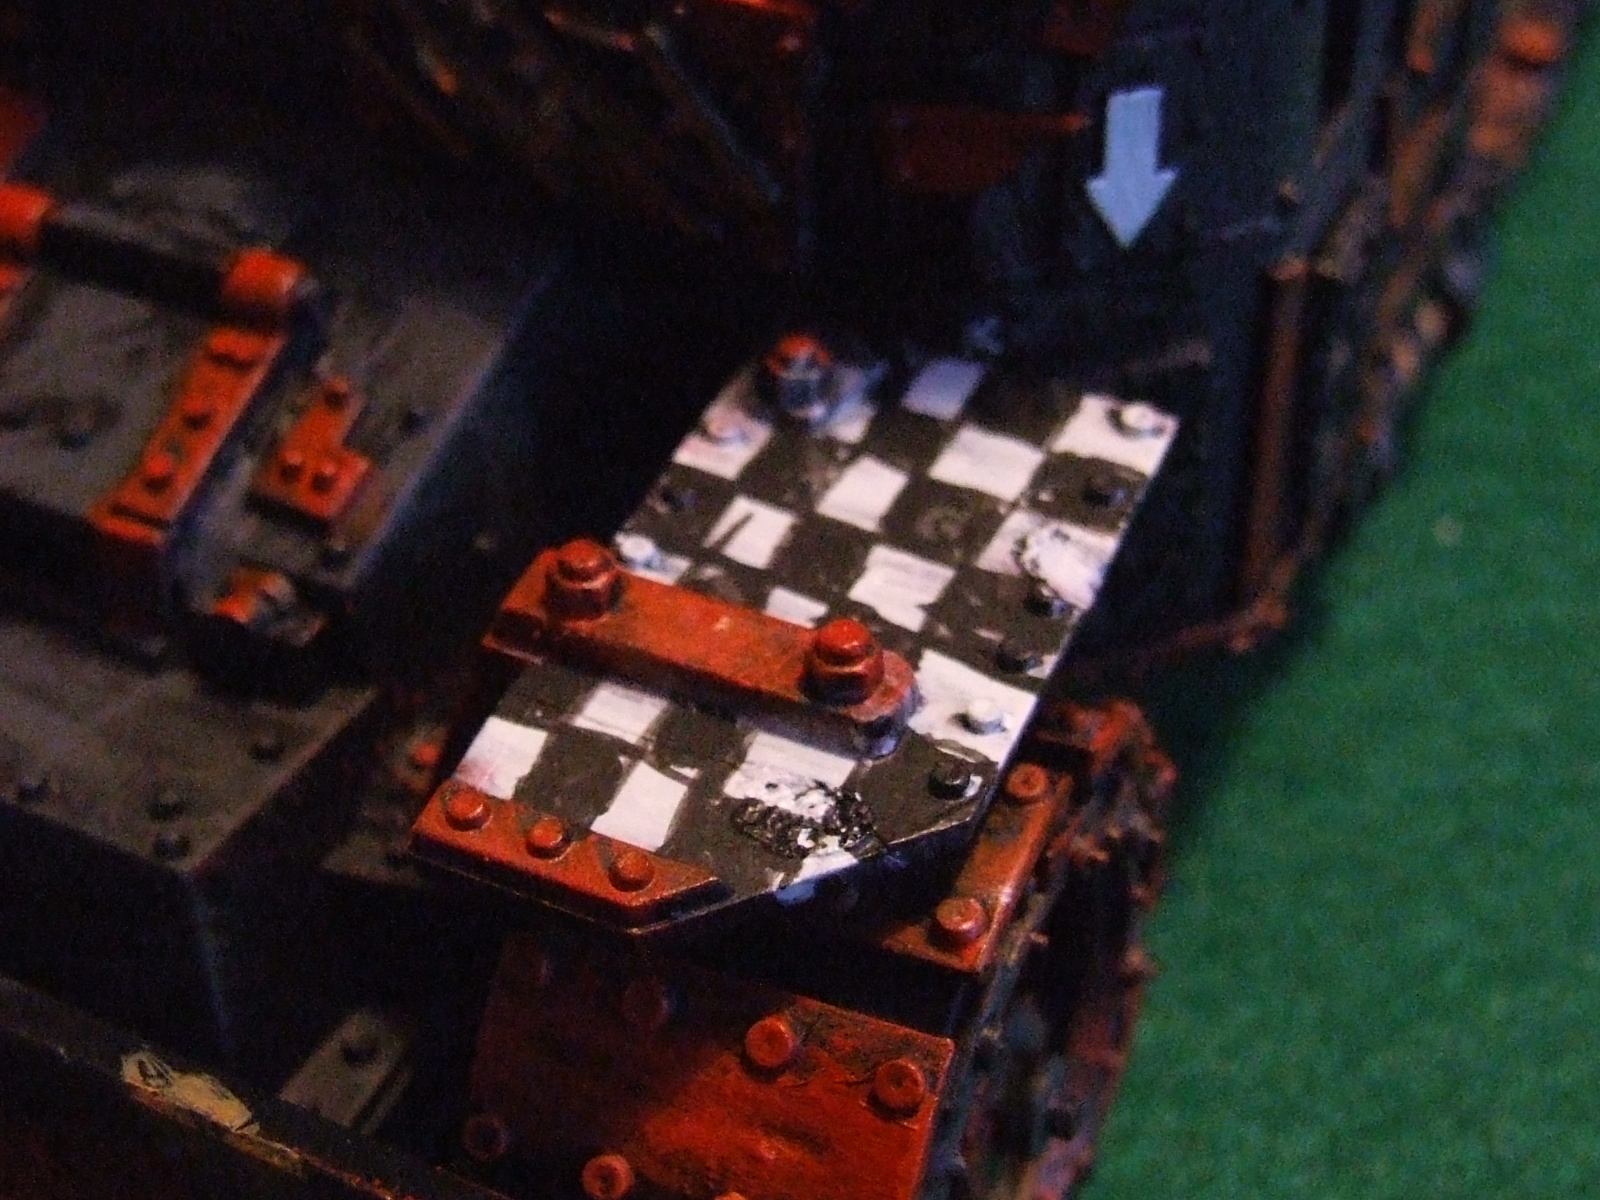
(Tutorial) How To Paint Black And White Squares On Ork Vehicles (Part 2)


So I have just managed to finish Part 2 of this tutorial, and below you will find the highlighting steps in sequence for you to follow step-by-step.

After you have completed part one this is what the areas should look like.

So next is the highlighting stage and it needs to be said is one of the most important steps to get right, failure to do so will make the boxes look terrible. So the trick is to take your time not to rush.

Below you will also see some pictures of the highlights themselves this will give you an idea in regards to what colour you're aiming for when you want to highlight.

Highlight 1

when it comes to applying paint just target in the middle of the Square less is more

Highlight 2


Highlight 3


As you can see because you've taken your time and you have built the highlights slowly overall it makes them look three-dimensional.


you can see the finished result quite clearly and it really doesn't take no time at all


so there we have it job done and this technique can be used for any colour at your disposal.

Wednesday, 15 June 2011

(Tutorial) How To Paint Black And White Squares On Ork Vehicles (Part 1)

(Hobby Update) Started To Paint Black And Square On My Orks Battlewagon

I have just managed to find time for another hobby update, like any ork player being able to paint black and white Square properly always comes in very handy for any project, so below you will find a couple of useful hints and tips to get you well underway.

First thing is do not use white straight out of the pot as a base coat it's better if you use a light grey to start you off as if you just use white it can stand out like a sore thumb.


So once you've decided what areas you're going to paint its time to start filling in them squares, so make sure your black paint is thin down with a little water, as you will find it easier to apply.

As you can see it's important to apply your base coat evenly and it's even better if it's a little transparent, as it all adds to the effect of the highlight


The outline does not have to be neat in some ways a little bit rough makes it look better

So there you have it in the next stage I will show you how to highlight all the little boxes, which really does make them stand out. So make sure you try and incorporate some little black-and-white boxes into your next project, as I think you'll agree nothing Look better.

Related Posts Plugin for WordPress, Blogger...